

Grand Canyon Hiking Guide: Best Trails, Tips & Must-See Views
Updated: Mar 18

Step Into the Grand Canyon: The Ultimate Hiker’s Guide to Trails, Views & Insider Tips
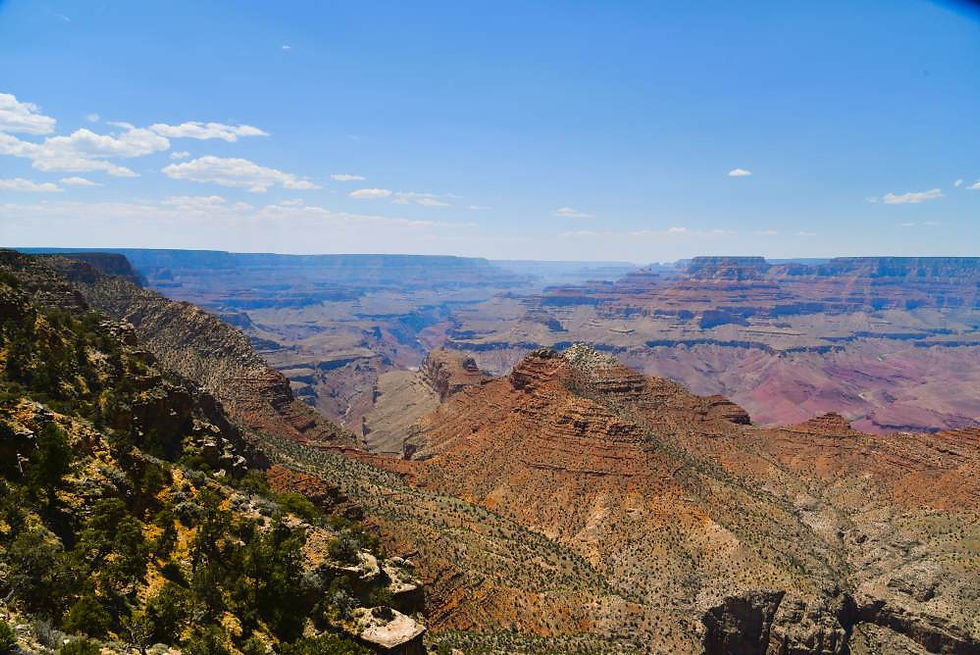
The Grand Canyon isn’t just a place you visit—it’s a place you experience, step by step, mile by mile. With every switchback, every overlook, and every sun-drenched canyon wall, you’ll feel the immensity of this natural wonder in a way that no photo can capture. We’ve hiked these trails, felt the burn in our legs, and stood in awe at the kind of views that stop you in your tracks.
In this guide, we’re not just listing trails—we’re taking you along for the journey. From the iconic Bright Angel and South Kaibab trails to hidden gems that most visitors overlook, we’ll share the must-hike routes, essential tips to stay safe and comfortable, and the best vantage points for jaw-dropping scenery. Whether you're a seasoned trekker or a first-time visitor eager to explore beyond the rim, consider this your ultimate roadmap to hiking the Grand Canyon the right way.
Table of Contents:
Choosing the Right Trail: Find Your Perfect Grand Canyon Adventure
The first big decision when hiking the Grand Canyon? Picking the right trail. With so many options—ranging from scenic strolls to knee-buckling descents—it’s easy to feel overwhelmed. But fear not! We’ve been there, boots on the ground (and sometimes feet aching), to bring you the best trail recommendations. While we didn’t tackle the hardest, most rugged routes ourselves, we’ve tapped into the wisdom of experienced hikers in our circle—family, friends, and adventure-loving travelers—to ensure you get the most accurate, real-world advice.
Because let’s be real: This isn’t just about picking any trail. It’s about choosing the right one for you—one that matches your skill level, keeps you safe, and lets you soak in the canyon’s jaw-dropping beauty without turning your hike into a survival mission.
Step One: Know Your Hiking Style
Before lacing up your boots, consider how much effort you’re up for. The Grand Canyon is a place where trails look inviting but can quickly humble even experienced hikers. Trust us—we learned that lesson fast. Here’s a breakdown of the best trails based on experience level:
Beginner-Friendly Trails: Easy Does It
If you want the views without the grueling climb (we get it, not every hike has to be a leg burner), these trails are perfect:
✔ Rim Trail (South Rim) – This mostly flat, paved path follows the canyon’s edge, serving up incredible vistas with minimal effort. You can hike a little or a lot—there are shuttle stops along the way if you want to hop on and off.
✔ Shoshone Point Trail – A short, relatively unknown gem with a stunning, crowd-free lookout at the end.
Intermediate Trails: A Bit More Adventure
Ready for something more challenging but not looking to crawl back to your car? These options offer a solid mix of effort and reward:
✔ Bright Angel Trail (South Rim) – This well-maintained trail descends into the canyon with water stations and rest stops along the way. We went partway down to Indian Garden and back—absolutely worth it, but the climb back up is no joke.
✔ North Kaibab Trail (North Rim) – Less crowded than its South Rim cousin, this trail has stunning rock formations and a remote feel. Many hikers go as far as Roaring Springs before turning back.
Advanced Trails: For the Hardcore Hikers
We didn’t attempt these (because we like our knees intact), but if you’re a seasoned hiker looking for a challenge, these are the trails that our more hardcore adventure friends swear by:
✔ Grandview Trail – Steep, rugged, and not for the faint of heart, but the views are unreal. There’s no water, so plan accordingly.
✔ Tanner Trail – A true backcountry experience, requiring serious preparation. Expect exposed terrain, steep drop-offs, and very few people.
Step Two: Consider the Season
The Grand Canyon is a place of extremes—snow and ice in the winter, blazing heat in the summer. Picking the right season can make or break your hike.
🍂 Fall to Spring (November–April): The Sweet Spot. This is our favorite time to hike. The weather is cool, the crowds are smaller, and the risk of heat exhaustion is low. Just be prepared for chilly mornings and the possibility of ice at higher elevations—especially on the Bright Angel and South Kaibab trails.
☀️ Summer (May–October): Proceed with Caution. The inner canyon can reach over 100°F (37°C), and heat exhaustion is real. If you’re hiking in summer, stick to the North Rim (cooler temperatures) or go early in the morning or late in the day. And hydrate like your life depends on it—because in this heat, it does.
Pick Smart, Hike Happy
Hiking the Grand Canyon is unforgettable, but it’s also serious business. Start with a trail that matches your fitness level, check the weather, and always bring more water than you think you need. Whether you’re taking a casual stroll along the rim or heading deep into the canyon, you’ll be rewarded with some of the most breathtaking views on Earth.
Our best advice? Don’t overdo it on your first go. The canyon will be here for a lifetime of return visits—pace yourself, enjoy the journey, and let the adventure unfold one step at a time.
South Rim Trails: The Best Hikes for Stunning Grand Canyon Views
When it comes to the Grand Canyon, the South Rim is where the magic happens. It’s home to some of the most accessible, family-friendly, and downright awe-inspiring hikes in the park. Whether you’re here for a bucket-list adventure or just want to stretch your legs while soaking in the views, the South Rim has something for everyone.
Consider this your go-to guide for picking the perfect South Rim hike—one that delivers big on scenery without leaving you questioning your life choices halfway through.

Bright Angel Trail
A Family’s Guide to the Grand Canyon’s Most Iconic Hike
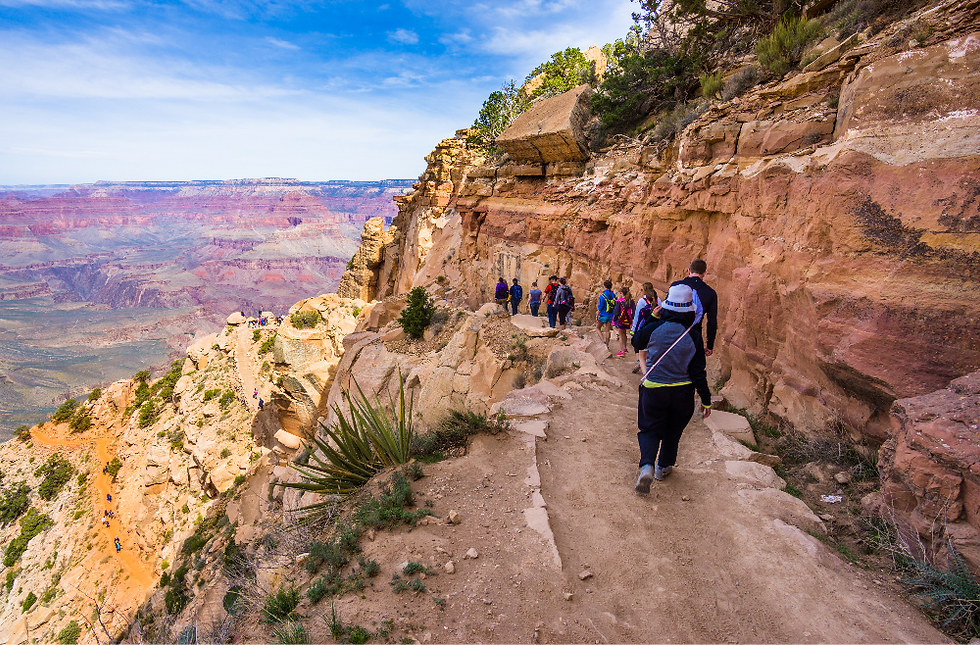
Some hikes feel like a journey—not just in miles but in sheer experience. The Bright Angel Trail is one of them. It’s the classic Grand Canyon hike, the one you see in travel guides, the one people talk about with a mix of awe and exhaustion.
Bright Angel isn’t just a trail—it’s an adventure. It takes you down into the canyon, step by step, revealing layer upon layer of stunning rock formations, breathtaking views, and oh yeah, the slightly terrifying realization that every step down means another step back up.
So, is it worth it? Absolutely. But you’ve got to go in prepared. That’s why we’ve put together this guide—a family-friendly, real-world breakdown of what to expect, which landmarks to aim for, and how to make the most of your time on one of the best hikes in the world.
Why Bright Angel Trail?
✔ Well-Maintained: The safest route into the canyon, with sturdy switchbacks and a (mostly) predictable path.
✔ Water Stations: You won’t find this luxury on many Grand Canyon trails. Water is available at several key points—but bring your own, too.
✔ Choose Your Own Adventure: With several natural turnaround points, you can decide just how far you want to go without committing to an all-day trek.
✔ Views for Days: Every step down is insanely scenic. But don’t let the beauty fool you—the real challenge is coming back up.
How Far Should You Hike? A Family-Friendly Breakdown
One of the best things about Bright Angel is that you don’t have to hike the whole thing to get an incredible experience. It’s a 15.3-mile round trip to the Colorado River (which we did not attempt because we had a variety of ages and fitness levels with us). Instead, here’s what we—and our more adventurous hiker friends—recommend:
Quick & Scenic: First Tunnel (0.1 miles roundtrip, ~20 min)
Perfect for families with young kids or anyone short on time
No major elevation change
A cool little rock tunnel + a great introduction to the canyon
This is just a short out-and-back detour, but it’s a great way to dip your toes into Bright Angel without a big commitment. And honestly? The views here are already spectacular.
A Little More Adventure: Second Tunnel (1.8 miles roundtrip, ~1-2 hrs)
A solid option if you want a short but rewarding hike
Some elevation change (590 feet) but still very manageable
Gorgeous views of the canyon without too much effort
This is where you start to get a real feel for what hiking into the Grand Canyon is like—without completely exhausting yourself. A great family-friendly option.
Stepping it Up: 1.5-Mile Resthouse (3 miles roundtrip, ~2-4 hrs)
One of the most popular turnaround points
Elevation change: 1,120 feet (translation: you’ll feel this on the way back up)
Water station + rest area (a major bonus)
We hiked to this point, and it was the perfect challenge—far enough to feel like we got the real Bright Angel experience, but not so far that we regretted it later. The way down? Glorious. The way up? Let’s just say we took a lot of breaks.
For the More Ambitious: 3-Mile Resthouse (6 miles roundtrip, ~4-6 hrs)
A bigger challenge but still doable for fit hikers
Elevation change: 2,120 feet (your legs will notice)
Water station + shade (thank goodness)
If you’re up for a half-day adventure, this is the turnaround point that really starts to feel like you’re in the canyon. Just keep in mind: The farther down you go, the harder the climb back up.
A Full-Day Hike: Havasupai Gardens (9 miles roundtrip, ~6-9 hrs)
An oasis in the canyon—literally! It’s shady, green, and peaceful.
Elevation change: 3,040 feet (this is a serious workout)
Camping available (but must be reserved in advance)
A few hikers in our group made it here and loved it—but they also strongly recommended not attempting it as a day hike unless you’re in great shape. Always check with a park ranger before attempting this one!
Only for the Hardcore: Plateau Point (12 miles roundtrip, ~9-12 hrs)
One of the best views of the Colorado River
Elevation change: 3,080 feet (seriously intense)
Not recommended as a day hike unless you’re very experienced
We didn’t attempt this one, but our ultra-hiker friends did—and they raved about the views. Just know: This is a massive undertaking. Don’t try it without proper preparation.
What You Need to Know Before You Go
Water, Water, Water: Yes, there are water stations at key points, but they’re not always guaranteed to be working. Always bring your own supply.
The Way Down is Deceptively Easy: It feels like you’re just floating downhill, taking in the sights. But coming back up? That’s where the real work begins. Rule of thumb: Expect the hike back up to take twice as long as the way down.
Start Early: Especially in warmer months, it gets hot fast. The earlier you start, the better your experience will be.
Take Breaks (and Enjoy Them!): The Grand Canyon is meant to be savored. Stop at the rest areas, snap some photos, and give yourself permission to take it all in.
Information from the National Park Service, Grand Canyon National Park
Should Your Family Hike Bright Angel?
If you’re up for an adventure and want to experience the Grand Canyon beyond just standing at the rim, yes. Bright Angel is worth it. Just pick a distance that fits your ability and comfort level. You don’t have to go far to get an incredible experience.
For us, the 1.5-Mile Resthouse was perfect—enough to feel like we had truly hiked into the canyon, but not so much that we regretted it later. The views, the challenge, the sense of accomplishment? Unforgettable.

South Kaibab Trail
A Family’s Guide to the Grand Canyon’s Most Epic Views
Some hikes are about the journey. Others? They’re about the views. And if you’re looking for the hike that serves up nonstop, jaw-dropping, “is this even real?” scenery, the South Kaibab Trail is it.
We stayed at the Grand Canyon for five days, making it our mission to try a different hike or adventure each day. My younger brother—who loves a good challenge and is in peak shape—was with us and, unsurprisingly, took most of the hikes even further than we did. While we stopped at scenic turnarounds, he pushed on, tackling steeper climbs and longer distances, coming back with wild stories and a look that said, totally worth it. So, whether you’re here for a quick, scenic trek or want to venture deeper into the canyon, we’ve got the inside scoop on what to expect, what to bring, and which stops make the most sense for your adventure level.
Why Hike the South Kaibab Trail?
The South Kaibab Trail is steep, exposed, and absolutely breathtaking. It’s the kind of hike where you feel like you’re in the Grand Canyon rather than just looking at it from above. But unlike Bright Angel Trail (which has water stations, rest areas, and a gentler grade), South Kaibab is all about the thrill—big views, big descents, and a big climb back up.
Here’s what makes it special:
✔ Unbeatable Views: No trees, no obstructions—just canyon views in every direction.
✔ Short & Sweet Options: Even a quick hike to Ooh Aah Point will make your day.
✔ Less Crowded: Since it’s steeper and has no water, fewer people venture down, making for a more peaceful experience.
✔ Epic Sunrises: This is the trail for a sunrise hike—those first rays of light hitting the canyon walls? Unreal.
🚨 Important Note: There’s no water on this trail—not at the trailhead, not at any rest stops. Nada. You’ll need to bring all the water you plan to drink.
How Far Should You Go? A Breakdown of the Best Turnaround Points
The full South Kaibab Trail is 14.5 miles round trip to the Colorado River (which my husband, son and I did NOT attempt). Instead, we found that the best way to experience this hike is to pick a turnaround point that matches your fitness level and time constraints.
Ooh Aah Point (1.8 miles round trip, ~1-2 hours)
Best for families, first-timers, or anyone who wants a quick, scenic hike
Elevation change: 790 feet (steep but manageable!)
Views: Incredible—you’ll feel like you’re standing inside a real-life painting
If you only do one short hike in the Grand Canyon, make it this one. Ooh Aah Point is just under a mile down, but the name says it all—the views are that good. It’s a steep but short hike, and totally doable as long as you take your time on the way back up.
Cedar Ridge (3 miles round trip, ~2-4 hours)
A solid half-day adventure—long enough to feel accomplished, short enough to make it back for lunch
Elevation change: 1,120 feet (you’ll feel this on the way up!)
Has restrooms, but still no water—so bring what you need
Cedar Ridge is a fantastic option for those who want to go beyond Ooh Aah Point without committing to an all-day hike. There’s plenty of space to sit, snack, and soak in the views, and it’s a natural stopping point before the trail starts getting more intense.
Skeleton Point (6 miles round trip, ~4-6 hours)
For hikers who want a real challenge but not an overnight trek
Elevation change: 2,040 feet (translation: prepare to work those legs!)
First point where you can see the Colorado River
This is where things get serious. Skeleton Point is the farthest recommended turnaround for a day hike because beyond this, the climb back up becomes brutal. If you’re in great shape and start early, this is an epic hike—but be sure to carry plenty of water and check with a park ranger before attempting it in hotter months.
Things You Need to Know Before Hiking South Kaibab
No Water = Bring Your Own – We cannot stress this enough. This trail is completely exposed, and dehydration sneaks up fast. Pack at least 2-3 liters per person.
The Way Down is Easy—Too Easy – It’s all fun and games until you have to climb back up. Plan for the return hike to take at least twice as long as the descent.
Start Early – Especially in spring, summer, and fall—by midday, the sun is relentless, and there’s zero shade.
Trekking Poles Help – If you’re going beyond Ooh Aah Point, they’ll save your knees on the way down and give you a boost on the way up.
Watch Your Step – This trail is steep and exposed in sections, meaning parts have sheer drop-offs. If you’re hiking with kids, keep them close.
Information from the National Park Service, Grand Canyon National Park
So, Should Your Family Hike South Kaibab?
If you’re up for a little adventure, breathtaking views, and don’t mind a tough climb back up, then yes—absolutely. Even if you only go to Ooh Aah Point, this trail is worth it.
But—if you or your group aren’t used to steep trails or extreme heat, consider stopping at Cedar Ridge rather than pushing too far. This hike is a reminder that in the Grand Canyon, going down is optional—coming back up is mandatory.
Our South Kaibab Takeaway
For us, Ooh Aah Point was perfect for a quick, incredible Grand Canyon experience—short, steep, but worth every step. If you have the time and stamina, Cedar Ridge is even better—a true “inside the canyon” moment without too much effort. And for those looking for a serious challenge, Skeleton Point delivers.

Rim Trail
A Family-Friendly Way to Take in the Grand Canyon’s Best Views
Not every Grand Canyon hike has to leave your legs screaming and your water bottles running low. If you want breathtaking views without the brutal climb back up, the Rim Trail is your best friend.
It’s the perfect way to soak in the canyon’s beauty without committing to a full-day trek or an intense climb. Plus, it’s versatile—you can hike as little or as much as you want, thanks to the handy shuttle bus system that lets you hop on and off at various points along the route.
So if you’re looking for a family-friendly, customizable, and totally stunning way to experience the Grand Canyon, this is it.
Why Hike the Rim Trail?
✔ Easy & Accessible: Mostly flat, partially paved, and great for all fitness levels.
✔ Unbeatable Views: Nearly every step comes with sweeping canyon panoramas—no climbing required.
✔ Pick Your Own Adventure: Hike a few minutes or a few miles—you decide.
✔ Shuttle Stops Along the Way: Need a break? Catch a ride back! (Our favorite hack for seeing more without overdoing it).
✔ Perfect for Families & Groups: Whether you’ve got kids, older relatives, or someone who just wants to take it easy, this trail makes sure everyone gets to enjoy the canyon.
How Far Should You Hike? The Best Stops Along the Rim Trail
The Rim Trail runs for 13 miles from Mather Point to Hermits Rest, but don’t let that number scare you—you can break it into smaller sections, stopping at scenic overlooks, rest areas, and shuttle stops along the way. Here’s what we found to be the best sections:
If You Want a Quick & Easy Walk: Mather Point to Yavapai Point (1.4 miles round trip)
Effort: Super easy (flat, paved, and stroller/wheelchair-friendly)
Views: Some of the best introductory views of the Grand Canyon
Why We Loved It: Close to the Visitor Center, perfect for first timers
This is the classic first walk when you arrive at the Grand Canyon. The views from Mather Point are stunning, and Yavapai Point has an indoor observation area (great for colder days). It’s an easy, short, and rewarding section of the Rim Trail that everyone in the family can do.
If You Want a Great Photo Spot: Hopi Point (0.8 miles from Powell Point)
Effort: Easy (mostly flat, dirt trail)
Views: One of the best sunset spots in the Grand Canyon
Why We Loved It: Unreal panoramic views + fewer crowds than Mather Point
Hopi Point is one of the top places to catch a sunset, and trust us—it delivers. My younger brother (who usually prefers the toughest trails) admitted this was one of his favorite spots, simply because the view was that insane.
🚍 Pro Tip: The shuttle stops here, so you can hike one way and ride back after sunset (because hiking in the dark? No thanks).
If You Want to Walk a Bit More: Trailview Overlook to Mohave Point (~2 miles one way)
Effort: Moderate (some dirt trail sections, but nothing too hard)
Views: Huge, sweeping views of the canyon AND Bright Angel Trail
Why We Loved It: You get two different perspectives—looking into the canyon and down at other hikers
If you’re curious about the steeper hikes but don’t want to commit, this section is cool because you can watch hikers winding down Bright Angel Trail (from a safe, non-sweaty distance). The views at Mohave Point are underrated—and less crowded than Hopi Point.
If You Want a Half-Day Adventure: Monument Creek Vista to Hermits Rest (~4 miles one way)
Effort: Moderate but longer (dirt trail, some gentle ups and downs)
Views: Expansive and dramatic—you feel like you have the canyon all to yourself
Why We Loved It: Ends at Hermits Rest, where you can grab a snack & rest
This is one of the quieter sections of the Rim Trail—perfect if you want a peaceful, crowd-free hike. The trail here is less developed, so it feels more rugged and remote.
🚍 End-of-Hike Treat: Hermits Rest has a snack bar (hello, well-earned ice cream break).
Things to Know Before Hiking the Rim Trail
Bring Water & Snacks – Even on an easy hike, the canyon is dry—stay hydrated!
Wear Sunscreen – A lot of this trail is exposed to the sun—protect yourself.
Shuttle Bus = Your Best Friend – Plan ahead and use it to maximize your time & energy.
Layer Up – Even in summer, mornings and evenings get chilly. In winter? Cold AND windy.
Information from the National Park Service, Grand Canyon National Park
So, Should Your Family Hike the Rim Trail?
Yes. 100%.
Whether you’re up for a quick 20-minute walk or want to spend half the day exploring, the Rim Trail delivers incredible canyon views with zero stress.
For us, it was the perfect way to balance out our trip—giving our legs a break from the tougher hikes while still taking in some of the most breathtaking scenery we’ve ever seen. My younger brother (aka the guy who took every hike to the extreme) even admitted that some of these views rivaled the ones he worked so hard for.
So, if you’re visiting the Grand Canyon, don’t skip the Rim Trail. It’s one of the easiest, most rewarding ways to experience this natural wonder.
North Rim Trails: A Quieter, Wilder Side of the Grand Canyon
If the South Rim is where all the action is, the North Rim is where you go to escape. Fewer people, cooler temperatures, and trails that feel like you’ve stumbled into a secret part of the Grand Canyon where time slows down.
So if you’re looking for a break from the crowds and a chance to experience the Grand Canyon in a whole new way, here’s what we found to be the best trails on the North Rim.

North Kaibab Trail
A Grand Canyon Adventure for Those Who Want to Go Deeper
Some hikes make you feel like you’re part of the Grand Canyon instead of just looking at it. That’s North Kaibab Trail in a nutshell. It’s steep, stunning, and a little bit humbling—but for those willing to venture down, it offers some of the most unforgettable sights in the entire park.
While we took in the breathtaking views at a more manageable pace, my younger brother—always up for a challenge—pushed himself to go farther, descending deeper into the canyon than the rest of us. He came back with stories of rugged switchbacks, hidden waterfalls, and the kind of exhaustion that somehow makes an experience even more rewarding. Meanwhile, we still got to soak in the incredible scenery and enjoy a hike that felt just right for us.
Whether you’re here for a short trek to Supai Tunnel or feeling ambitious enough to make it all the way to Roaring Springs, here’s what you need to know about one of the most rewarding (and underrated) hikes in the Grand Canyon.
Why Hike the North Kaibab Trail?
✔ It’s More Remote & Peaceful – The North Rim gets only 10% of the Grand Canyon’s visitors, meaning fewer crowds and a more immersive experience.
✔ The Scenery Changes Dramatically – You start in lush alpine forests with aspens and fir trees, then descend into desert canyons with waterfalls. It feels like multiple hikes in one.
✔ Roaring Springs is Worth It – If you make it 5 miles down, you’ll reach a gushing waterfall oasis in the middle of the desert. (Magical is an understatement.)
✔ It’s the Only North Rim Trail Into the Canyon – If you’re staying at the North Rim, this is the trail to do if you want to experience what it’s like below the rim.
🚨 But fair warning: This trail is steep and challenging, and what feels easy going down becomes a serious climb back up. Plan accordingly!
How Far Should You Hike? (Pick the Right Turnaround Point!)
The full North Kaibab Trail is 14 miles one way (aka a two-day adventure for serious backpackers). But for most hikers, the best plan is to pick a turnaround point that matches your fitness level and time. Here’s what we recommend:
If You Want a Short But Scenic Hike: Supai Tunnel (3.4 miles round trip, ~2-3 hours)
Effort: Moderate (steep descent, but manageable)
Views: Great canyon vistas + a tunnel carved into the rock!
Why We Loved It: A solid “taste” of North Kaibab without committing to a full-day hike
Supai Tunnel is a great choice if you want to get below the rim but don’t have all day. The tunnel itself—literally carved into the canyon wall—is a cool landmark, and the trail offers stunning views without pushing you too far.
Bonus: There’s seasonal water here, but always bring your own just in case.
If You Want a Bigger Challenge: Roaring Springs (9.4 miles round trip, ~6-8 hours)
Effort: Strenuous (big elevation change, long hike back up)
Views: Incredible canyon walls + a roaring waterfall oasis
Why We Loved It: Totally different from the South Rim—lush, secluded, and peaceful
My younger brother took this one on while we stopped at Supai Tunnel, and when he came back, he was still hyped about it. At Roaring Springs, water literally bursts from the rock, creating a lush green oasis in the middle of the desert. It’s one of the most rewarding destinations in the Grand Canyon—but be warned: the hike back up is no joke.
🚶♂️ Pro Tip: If you plan to do this, start early, bring tons of water, and pace yourself.
If You’re Hardcore: Bright Angel Campground (28 miles round trip, 2+ days)
Effort: Extreme (this is Rim-to-River territory)
Why We Loved It: We didn’t do this (because we like our knees), but backpackers rave about it
If you’re planning to camp overnight, you can continue past Roaring Springs to Ribbon Falls, Phantom Ranch, or Bright Angel Campground. Just know: this is a major commitment and requires permits + serious preparation.
What Makes This Hike Unique?
A Higher Starting Point = A Totally Different Vibe
The North Kaibab Trail starts at 8,241 feet, meaning you get cooler temps, alpine forests, and wildflowers before descending into the classic canyon scenery. It’s a completely different feel than the South Rim hikes.
A Trail Built Into the Rock (Literally)
One of the coolest parts of this trail is how it hugs the canyon walls. At points, it feels like you’re walking through history, as the trail was carved into the Redwall Limestone cliffs.
Waterfalls in the Desert
The Grand Canyon isn’t just rock—and this trail proves it. Roaring Springs and Ribbon Falls are lush, green, and full of life, making them feel completely surreal in the middle of such a dry landscape.
Things to Know Before Hiking North Kaibab
The Way Down is Easy—The Way Up is Brutal – The elevation change is serious (over 3,800 feet if you go to Roaring Springs). Whatever time it takes you to go down, expect twice as long to come back up.
Water is Limited – There are some seasonal water sources, but always bring at least 3 liters per person.
Prepare for Changing Weather – Mornings can be cold (you’re starting at high elevation), but by the time you reach Roaring Springs, it’s hot.
Start Early – This is not a hike you want to be finishing in the heat of the day.
So, Should Your Family Hike the North Kaibab Trail?
Yes—if you’re up for adventure.
The North Kaibab Trail is steep, stunning, and incredibly rewarding. If you just want a quick, beautiful hike, stop at Supai Tunnel. If you want a challenge with an epic payoff, Roaring Springs is worth every step. And if you’re a hardcore hiker or backpacker, this trail is your gateway to some of the best backcountry experiences in the Grand Canyon.
For us, North Kaibab was an eye-opener—a reminder that the Grand Canyon isn’t just one landscape, but many, layered on top of each other. And even though my brother took it further, we still felt like we got an amazing experience by going just partway down.
So if you want to see the Grand Canyon from a different perspective—and don’t mind the challenge of climbing back up—North Kaibab is absolutely worth the trek.

Widforss Trail
A Peaceful Escape on the North Rim
After days of tackling the steeper, more intense trails of the Grand Canyon, we were ready for something different. Something that didn’t involve switchbacks that make your legs question your life choices. Something quiet, shaded, and just as stunning as the canyon itself—without the heart-pounding climb back up.
Enter Widforss Trail.
If you think the Grand Canyon is all dramatic cliffs and rocky terrain, this trail will surprise you. Instead of winding down into the depths of the canyon, Widforss Trail leads you through a forest of towering pines, past meadows, and along sections of the canyon rim, offering a mix of shade, solitude, and jaw-dropping viewpoints. It’s the kind of hike that makes you slow down and appreciate the little things—the rustling of trees, the scent of pine needles, the way the light filters through the branches.
Why Hike Widforss Trail?
✔ A Break from the Rugged Canyon Terrain – Instead of harsh desert landscapes, you’re walking through a lush, shaded forest with plenty of room to breathe.
✔ Uncrowded & Peaceful – The North Rim already gets fewer visitors, and this trail is one of the quieter ones. If you’re craving solitude and nature, this is it.
✔ Stunning Views—Without the Climb – The trail starts along the rim, so you still get epic canyon views without the exhausting climb back up (hallelujah!).
✔ Wildlife Everywhere – Deer, wild turkeys, and the super rare Kaibab squirrel (it has a fluffy white tail and looks like it belongs in a Pixar movie).
How Far Should You Go? (Pick Your Own Adventure)
Widforss Trail is 10 miles round trip, but here’s the best part: you don’t have to hike the whole thing to get an incredible experience.
If You Just Want a Taste: Hike the First 2.5 Miles (~1-2 hours round trip)
Effort: Easy (flat, shaded, great for all fitness levels)
Views: Canyon overlooks + peaceful forest
Why We Loved It: A perfect, low-key Grand Canyon experience
The first few miles follow the canyon rim, giving you amazing views without much effort. If you’re looking for a short, relaxing walk, this is a fantastic way to experience the North Rim without overcommitting.
If You Want the Full Experience: Hike to Widforss Point (10 miles round trip, ~4-6 hours)
Effort: Moderate (long, but gradual elevation change)
Views: Incredible canyon overlook at the end
Why We Loved It: Shaded, quiet, and rewarding without being too hard
If you go all the way, you’ll be rewarded with a stunning view at Widforss Point. It’s less dramatic than some of the South Rim overlooks, but the beauty here is in the solitude and sense of discovery.
Things to Watch for Along the Trail
Wildlife (Keep Your Eyes Peeled!)
This trail is one of the best in the park for spotting wildlife.
Unexpected Canyon Views
Even though the trail mostly winds through the forest, there are several points where you get huge, unexpected glimpses of the canyon. These little surprises make the hike even more rewarding.
A True “Disconnect and Recharge” Trail
No steep climbs. No distractions. Just you, the trees, and the canyon stretching out before you. It’s the perfect hike for slowing down and really soaking in the moment.
Things to Know Before Hiking Widforss Trail
You’re at 8,000+ Feet—Take It Slow – Even if the hike itself isn’t hard, the altitude can make you feel out of breath faster than expected.
Bring Water & Snacks – There’s no water along the trail, and at this elevation, you’ll get dehydrated faster than you think.
It Can Get Warm—Even in the Shade – Yes, it’s a forest, but it’s still the Grand Canyon. Bring a hat and sunscreen for the open sections.
Start Early for the Best Experience – The lighting is beautiful in the morning, and you’ll have the trail mostly to yourself.
So, Should Your Family Hike Widforss Trail?
Absolutely—especially if you want a more peaceful side of the Grand Canyon.
This was the perfect break from the rugged, steep canyon trails we tackled earlier in the trip. It’s easygoing yet rewarding, scenic yet uncrowded. And for those who want a longer hike without punishing elevation changes, this is one of the best trails on the North Rim.
For us, it was a welcome change of pace—a chance to soak in the quieter side of the Grand Canyon, enjoy stunning but subtle views, and appreciate how different the North Rim feels.
If you’re looking for a less crowded, more peaceful hike, Widforss Trail is 100% worth it.

Cape Royal Trail
The North Rim’s Most Jaw-Dropping Views (and the Easiest Way to Get Them)
Some Grand Canyon views make you work for it—miles of switchbacks, steep climbs, and sore legs that last for days. Cape Royal? It’s the opposite.
This is the North Rim’s grand finale—a drive, a short walk, and some of the most sweeping, panoramic views in the entire park. No brutal climbs. No grueling hikes. Just pure, jaw-dropping, postcard-worthy Grand Canyon magic.
Why Visit Cape Royal?
✔ Best Views on the North Rim—Period. – If you want the most expansive, wide-open, “wow” views of the Grand Canyon, this is where you go.
✔ No Strenuous Hiking Required. – The trail is short, paved, and flat—which means anyone (kids, grandparents, even those recovering from yesterday’s killer hike) can enjoy it.
✔ Sunset Spot of Your Dreams. – The way the canyon glows in the fading light? Unreal. This is one of the best sunset spots in the park.
✔ So Much More Than Just One View. – The drive to Cape Royal is a mini-adventure in itself, packed with overlooks, ancient ruins, and secret trails worth stopping for.
The Drive: Getting to Cape Royal
🚗 The Most Scenic Drive on the North Rim
Cape Royal isn’t just a viewpoint—it’s the grand finale of a ridiculously scenic drive. Along the way, you’ll pass through forests, canyons, and meadows, with plenty of places to pull over and soak in the sights.
Drive time: About 45 minutes each way from the North Rim Visitor Center (longer if you stop often—which you definitely should).
Must-Stop Overlooks & Short Hikes on the Way
Point Imperial (The Highest Viewpoint at 8,803 Feet)
Why Stop? The highest point on the North Rim, with insane views of the Painted Desert.
Worth It? Absolutely. It’s less crowded than Cape Royal and offers a totally different perspective of the canyon.
Vista Encantada (Perfect Picnic Stop)
Why Stop? If you packed lunch (or just need a snack break), this is your spot.
Worth It? Yes! Canyon views + a peaceful picnic area = a win.
Walhalla Glades Pueblo (A Quick Step Back in Time)
Why Stop? A short interpretive walk takes you through the ruins of an ancient Native American site.
Worth It? If you like history and seeing how people lived here long before it was a National Park, yes.
Cliff Springs Trail (A Hidden Gem for a Quick Hike)
Why Stop? A short hike (about a mile round trip) that takes you to a small spring and past old rock dwellings.
Worth It? If you want a quick, easy adventure, this trail is a fun surprise.
Cape Royal: The Best Views on the North Rim
Once you finally get to Cape Royal, this is where the magic happens.
Best Sunset Spot on the North Rim: If you’re here in the evening, stay for sunset. Watching the canyon walls shift from gold to pink to deep red is one of those moments that stays with you forever.
Stand on Angels Window (If You Dare!): One of Cape Royal’s most famous features is Angels Window, a massive rock arch that lets you look straight through to the Colorado River far below.
Look Across to the Desert View Watchtower: From Cape Royal, you can actually see the Desert View Watchtower all the way across the canyon on the South Rim. It really puts the vastness of the Grand Canyon into perspective.
Things to Know Before You Go
The Trail is Super Easy – It’s paved, level, and less than a mile round trip. If you want a Grand Canyon view without a workout, this is it.
Bring Snacks & Water – There’s no food or water here, and the drive back takes a while.
Start in the Afternoon & Stay for Sunset – You’ll get amazing lighting for photos and the best possible sendoff for your Grand Canyon trip.
The Road Closes in Winter – The North Rim is only open mid-May to mid-October, so plan accordingly.
So, Should Your Family Visit Cape Royal?
100% YES.
If you’re visiting the North Rim, Cape Royal is the ultimate must-do. It’s easy, accessible, and offers some of the most breathtaking views in the entire Grand Canyon.
For us, it was the perfect way to end a day of exploring. We all agreed that Cape Royal was a highlight of the trip. There’s something about standing on the edge of the canyon, with nothing but sky and endless rock formations stretching in every direction, that makes you feel completely in awe of this place.
So whether you’re here for a quick visit, an epic sunset, or just an easy way to see the canyon’s beauty, Cape Royal is absolutely worth the drive.
Inner Canyon Trails
The Grand Canyon’s Wild Side
Our five-day Grand Canyon trip was packed with adventure—we hiked the best trails on both the North and South Rims, took in jaw-dropping views, and found that perfect balance between pushing ourselves and soaking in the scenery.
But here’s the thing: We barely scratched the surface.
The Grand Canyon isn’t just about standing at the rim and looking down—some of its most jaw-dropping, soul-stirring, once-in-a-lifetime experiences happen inside the canyon. The inner canyon trails take you beyond the overlooks and into the depths of this epic landscape.
While we didn’t have time on this trip to venture all the way down (hiking back up is a whole different beast), we did our research—and we talked to some friends and fellow hikers who did. So, if you have more time (and strong legs, and the willpower to climb back out), here are some of the most incredible inner canyon trails worth considering.

Why Hike Into the Inner Canyon?
✔ See the Grand Canyon From a Completely Different Perspective – Looking down at the canyon is one thing. Standing inside it, surrounded by towering cliffs, is something else entirely.
✔ Experience True Solitude – While the rim trails can be busy, the deeper you go, the fewer people you’ll see.
✔ Chase Waterfalls & Hidden Gems – Some of the most surreal sights in the Grand Canyon (hello, turquoise waterfalls) are only accessible if you hike in.
✔ A Major Accomplishment – These hikes are hard—but if you make it down and back up, you’ll never forget it.
🚨 Important Note: All inner canyon hikes are serious undertakings. These trails are steep, exposed, and offer zero shortcuts back up. If you go down, you have to climb back out—so plan wisely.
Inner Canyon Trails (For Those Ready to Go All In)
Havasu Falls Trail (For the Ultimate Desert Oasis)
Distance: 20 miles round trip (yep, you read that right)
Why It’s Amazing: Unreal turquoise waterfalls in the middle of the desert
Best For: Backpackers (or those lucky enough to snag a permit!)
If you’ve ever seen photos of glowing blue-green waterfalls tucked into red rock canyons, chances are you were looking at Havasu Falls.
This isn’t your typical Grand Canyon hike—it’s located outside the national park on Havasupai tribal land, and you need a permit to visit (which sell out crazy fast). But if you can snag one? It’s worth every step.
Overnight Required: This is not a day hike. It’s 10 miles one way, and you need to camp near the falls (or stay at the rustic lodge in Supai Village).

Grandview Trail (For Rugged Beauty & History)
Distance: 6 miles round trip (to Horseshoe Mesa)
Why It’s Amazing: Steep, unmaintained, and packed with history
Best For: Experienced hikers who want a wild, rugged adventure
The Grandview Trail is steeper and tougher than Bright Angel or South Kaibab, but if you’re into solitude, epic canyon views, and a bit of history, it’s a great pick.
What Makes It Special? This trail was originally built for copper miners in the 1890s, and you can still see old mining relics near Horseshoe Mesa—which makes for a solid turnaround point if you’re doing a day hike.
No Water + Unmaintained Trail – Unlike Bright Angel, there are no water stations or ranger stations—so you’re on your own.

Tanner Trail (For Those Who Want the River & Solitude)
Distance: 14 miles round trip (or farther if you keep going!)
Why It’s Amazing: Total seclusion + a rare close-up view of the Colorado River
Best For: Hardcore hikers who are prepared for remote backcountry hiking
The Tanner Trail is not for casual hikers. It’s long, totally exposed, and brutally steep coming back up. But if you’re craving a quieter, wilder side of the Grand Canyon, this trail delivers.
What’s the Reward?
Very few hikers—this is one of the least-traveled South Rim trails.
Expansive, wide-open views (like standing inside a canyon painting).
A rare chance to see the Colorado River up close (without doing a full rim-to-river trek).
🚨 Warning: There’s no water, no shade, and no help if you need it. Only do this if you’re experienced, well-prepared, and know what you’re getting into.
So, Should Your Family Hike Into the Inner Canyon?
For us, this trip wasn’t long enough to venture deep into the canyon—but if we had more time (and stronger legs!), Havasu Falls and Grandview Trail would have been at the top of our list.
If you’re an experienced hiker looking for something epic, an inner canyon trek could be the adventure of a lifetime. But if you’re not ready for the brutal climb back up, don’t worry—the Grand Canyon’s best views aren’t just at the bottom.

Grand Canyon Hiking Safety & Preparation: What We Learned the Hard (and Smart) Way
Here’s the thing about hiking in the Grand Canyon—it’s not like hiking anywhere else. It’s a place where you start by going downhill, which makes everything feel easier than it actually is. The real challenge? Getting back up.
When we spent five days exploring both the North and South Rims, we quickly learned that staying safe isn’t just about being cautious—it’s about being prepared. We saw hikers struggling because they didn’t bring enough water, tourists in flip-flops realizing their mistake way too late, and people who underestimated the heat, the elevation, and the sheer effort of climbing out of a canyon.
So, whether you’re planning a short scenic walk or a serious trek into the canyon, here’s everything we wish we knew before we laced up our boots.
1️⃣ The Downhill Trick (AKA, Don’t Let the Easy Start Fool You)
Going down feels easy. Too easy. Your legs feel great, you’re making great time, and the views are so good you forget to think about the way back
The climb up is twice as hard. The elevation gain, the sun exposure, the exhaustion—it all kicks in when you least expect it.
Rule of Thumb: However long it takes you to go down? Plan for at least twice that time to get back up.
Our Take: On our first big descent, we stopped halfway down, looked at each other, and thought, This isn’t so bad! Cut to two hours later: Sweaty, tired, and suddenly questioning every life decision as we climbed back up. Lesson learned.
2️⃣ Water Is Your Best Friend (And You’ll Need More Than You Think)
Hiking in the Grand Canyon = constant dehydration. Between the dry air, elevation, and intense sun, you’ll sweat more than you realize—so you need to drink constantly.
How Much Water Do You Need?
Short hikes (Rim Trail, Cape Royal, Ooh Aah Point): At least 1-2 liters per person.
Longer hikes (Bright Angel, North Kaibab, South Kaibab): At least 3-4 liters per person.
All-day hikes (Roaring Springs, Skeleton Point, Plateau Point): 4+ liters per person.
Pro Tip: Electrolytes matter. Water alone isn’t enough on long hikes—you need sports drinks, electrolyte tablets, or salty snacks to keep your body balanced.
3️⃣ Sun + Heat = A Brutal Combo
The sun in the Grand Canyon is next-level intense. Even in the spring and fall, it can get hot—and in summer? It’s downright dangerous.
Start Early: The best hiking hours are before 10 AM and after 4 PM.
Shade is rare: There are almost no shaded spots once you start descending.
Cover Up: Wear a hat, sunglasses, and light, breathable clothes. Bonus points for long sleeves to block the sun.
Sunscreen is non-negotiable. Apply it before you start, and reapply every couple of hours.
Our Take: We thought starting at 9 AM was early enough. Nope. By the time we were climbing back up, the sun was blazing, and we wished we had started at sunrise. Lesson learned.
4️⃣ Shoes Matter (Flip-Flops Are Not Your Friend)
🚫 If you take one thing from this guide, let it be this: DO NOT WEAR FLIP-FLOPS.
You need real hiking shoes or boots. The Grand Canyon trails are steep, rocky, and slippery in places. Your feet will thank you.
Best Footwear Options:
Hiking boots (if you want extra ankle support)
Trail runners (lightweight but still grippy)
Thick socks (blisters are real, and they are painful)
5️⃣ Snacks = Energy (And You’ll Need A Lot More Than You Think)
Food isn’t just for fun—it’s fuel. You’re burning tons of calories while hiking, and if you don’t eat, you’ll run out of energy fast.
Best Snacks for the Grand Canyon:
Trail mix (salty + sweet = perfection)
Energy bars (portable + packed with protein)
Peanut butter & crackers (easy to eat, high in protein & fat)
Beef jerky (salty = helps replace lost electrolytes)
Fresh fruit (apples, oranges, bananas) (hydrating & refreshing)
Our Take: At first, we packed just a couple of granola bars. Big mistake. By the time we hit the hardest part of the hike (the climb back up), we were starving. Lesson? Always pack extra snacks.
6️⃣ Know Your Limits (And Be Willing to Turn Around)
We get it—the views keep getting better the farther you go. But the Grand Canyon is unforgiving if you push past your limits.
Have a turnaround plan before you start. (Pick a landmark as your goal—Ooh Aah Point, 1.5-Mile Resthouse, etc.)
Check how you feel at your turnaround point. If you’re already feeling tired, heading back right then is your best bet
Listen to your body. If you feel dizzy, lightheaded, or overly exhausted—STOP.
What We Saw: We watched people force themselves to keep going when they were already struggling. That’s a recipe for heat exhaustion, dehydration, and a very miserable climb out.
7️⃣ Cell Service is Spotty (Have a Backup Plan)
📵 Don’t count on your phone to save you. Service drops off fast once you go below the rim.
Download maps ahead of time. (We used AllTrails & Google Maps offline mode.)
Tell someone where you’re going. Even for shorter hikes—just in case.
Carry a paper map. It feels old-school, but it works.
Our Take: We assumed we’d have service near the rim. Nope. The second we started descending? Nothing. Be prepared.
Hike Smart & Enjoy Every Step
The Grand Canyon is one of the most breathtaking places on Earth. But it’s also one of the most challenging places to hike.
If you plan ahead, bring the right gear, stay hydrated, and know your limits, you’ll set yourself up for an amazing, safe, and unforgettable adventure.
For us, every step was worth it—even the ones we struggled through. And after five days of hiking, exploring, and (yes) learning some lessons the hard way, we left knowing we’d done the canyon right.
So go out there, be prepared, and enjoy every moment. Because the Grand Canyon? It’s pure magic.

Where to Stay When Visiting the Grand Canyon
(You’ll Want a Good Night’s Sleep After Those Hikes)
After a long day of hiking, sightseeing, and having your mind blown by the Grand Canyon, you need a solid place to crash. The good news? There are plenty of options. The less good news? Places book up fast—so plan ahead.
Whether you want to wake up steps from the canyon’s edge, sleep under the stars, or find a comfy bed just outside the park, here’s the lowdown on where to stay when visiting the Grand Canyon.
Staying Inside Grand Canyon National Park (For Max Convenience)
If you want to wake up, step outside, and be right there staying inside the park is the way to go. These lodges are super popular, so book months in advance (especially in peak season).
South Rim Lodges (Closest to the Action)
If you’re visiting the South Rim (where most visitors go), these are your best bets for lodging inside the park:
Bright Angel Lodge & Cabins – Historic, charming, right on the rim. Some rooms have canyon views, and you’re steps from Bright Angel Trail.
El Tovar Hotel – The most famous (and most expensive) lodge in the park. Old-school luxury meets National Park vibes. If you want a room with serious history, book here.
Yavapai Lodge – No rim views, but solid rooms, a great location, and an easy walk to the rim.
Maswik Lodge – A good mid-range choice, recently renovated, and close to the shuttle stop.
Phantom Ranch – If you’re hiking to the bottom of the canyon, this is the only place to stay overnight. Bunks or cabins, lottery reservations required, and totally worth it.
🚨 Book ASAP! Lodges inside the park fill up months in advance—sometimes a year ahead for summer and holidays.
Camping Inside the Park (Sleeping Under the Stars Here = Magic)
If you’d rather camp than stay in a lodge, you have options—just don’t show up expecting to grab a site last minute.
Mather Campground (South Rim) – The main campground in the park. Tent and RV-friendly, but no hookups.
Desert View Campground (South Rim, More Remote) - 50 Campsites, most sites can accommodate tents or SMALL RV's or travel Trailers.
North Rim Campground – Only open mid-May to mid-October but quieter and more scenic than the South Rim.
Bright Angel Campground (At the Bottom of the Canyon) – For serious hikers only. You’ll need a backcountry permit to camp here.
Staying Outside the Park (For More Availability & Better Prices)
Tusayan (Best for Convenience)
If park lodges are full (or you want more dining options), Tusayan is your best bet. It’s just 15 minutes from the South Rim entrance and has hotels, restaurants, and even an IMAX theater. 👉 Find your perfect hotel in Tusayan here!
Williams, AZ (More Budget-Friendly & Route 66 Vibes)
About an hour from the South Rim, Williams is cheaper than Tusayan and has Route 66 charm (think diners, neon signs, and old-school motels).
🚆 Bonus: You can take the Grand Canyon Railway from Williams straight into the park.
No matter where you stay, just book early. The Grand Canyon is one of the most-visited places in the world, and rooms (and campsites) go fast.
Important Resources: Plan Your Grand Canyon Trip Like a Pro
Before you lace up your hiking boots and hit the trails, planning ahead is key—especially in a place as vast and unpredictable as the Grand Canyon. From camping permits to trail conditions, shuttle info to conservation efforts, these resources will help you plan smart, stay safe, and make the most of your adventure.
We used many of these and they made all the difference in checking trail updates, and knowing exactly what to expect.
Grand Canyon National Park: Your Official Starting Point
👉 National Park Service - Grand Canyon
If you need official park info, maps, entrance fees, or updates on closures, this is the place to start. It’s the ultimate guide to all things Grand Canyon, straight from the National Park Service (NPS).
Camping & Backcountry Permits: Book Early, Plan Smart
👉 Recreation.gov - Grand Canyon
If you’re camping inside the park, applying for a backcountry permit, or reserving a spot at Phantom Ranch, this site is your one-stop shop for all reservations.
🚨 Pro Tip:
Campground spots fill up fast—book as early as possible!
Backcountry permits (for hikes like Havasu Falls or overnight trips down Bright Angel) need to be secured months in advance.
Trail Conditions & Safety Info: Know Before You Go
If you’re planning any hike below the rim, check here first. Current trail conditions, water station updates, and safety advisories are all posted by park rangers.
💡 Why This Matters:
Water stations sometimes shut off. Know where to fill up.
Weather can change fast. Check for heat warnings, flash flood risks, or trail closures.
Want to Raft the Colorado River? Here’s How
If rafting through the canyon is on your bucket list, you’ll need to book through an authorized river outfitter or enter the NPS permit lottery.
🚣♂️ Pro Tip:
Commercial trips (guided rafting tours) book up a year or more in advance.
Self-guided permits are awarded through a lottery system—plan accordingly!
Support the Park & Learn More
The official nonprofit partner of Grand Canyon National Park, this group funds conservation projects, provides educational programs, and runs the park bookstores.
💡 Why Check It Out?
You can donate or volunteer to help preserve the canyon for future generations.
They offer awesome resources, including detailed guidebooks, maps, and Grand Canyon history.
Shuttle Schedules & Getting Around
The Grand Canyon’s shuttle system is a lifesaver—especially on the South Rim, where parking fills up fast.
🚍 What You Need to Know:
Shuttles are free and run on a loop system to major trailheads and overlooks.
Some shuttles are seasonal, so check the schedule before you go.
Key Hiking Messages
Hiking in the Grand Canyon is an unforgettable experience, but it’s also one of the most challenging places to hike. Whether you’re taking a short stroll along the Rim Trail or venturing deep into the canyon, preparation is key.
National Park Service Maps
Information and Maps from the National Park Service, Grand Canyon National Park

Your Grand Canyon Adventure Starts Here
Hiking the Grand Canyon isn’t just about the miles you cover—it’s about the moments that take your breath away (sometimes literally, if you underestimate that climb back up). Whether you’re standing at Ooh Aah Point, trekking down to Roaring Springs, or catching the sunset at Cape Royal, every step is a chance to connect with one of the most awe-inspiring places on Earth.
Our five-day adventure barely scratched the surface. There are countless trails, viewpoints, and hidden gems waiting to be explored. But no matter which route you take, one thing is certain—the Grand Canyon is a place that stays with you long after you leave.
So what’s next? Whether you’re planning a quick visit, a full-on hiking expedition, or a road trip through the Southwest, we’ve got you covered.
📍 Plan your perfect Grand Canyon trip: See our full Grand Canyon Travel Guide
🌵 Exploring more of the state? Check out our complete Arizona Travel Guide
🏜 Want to keep the adventure going? Don’t miss our guide to Utah’s National Parks🧭 For even more expert travel inspiration: Visit Lodestar Travel Guide
🚀 Ready to book your Grand Canyon adventure? Start planning your trip now!
Because the best way to experience the Grand Canyon? Go. See it for yourself. And let it change you in ways you never expected.

Top 10 Questions About Visiting the Grand Canyon
Visiting the Grand Canyon is a bucket-list experience, but planning your trip? It comes with a lot of questions. Some are obvious ("What’s the best hike?"), but others? Not so much. Like, Is there Wi-Fi? Should I be worried about altitude sickness? And is there actually a secret place to see the canyon without crowds?
Good news: We’ve got the answers.
1️⃣ How much time do I actually need at the Grand Canyon?
If you only have one day, you can still see a lot:
Drive or take the shuttle to the best viewpoints (Mather Point, Hopi Point, and Desert View Tower).
Hike a short section of Bright Angel or South Kaibab Trail for a taste of the canyon below the rim.
Stay for sunset—because watching the canyon light up in shades of gold and pink is mandatory.
If you have two to three days, you can:
Do a longer hike into the canyon (1.5-Mile Resthouse or Skeleton Point is doable).
Explore the North Rim for a totally different vibe.
Take a Colorado River rafting trip (or at least visit a spot where you can see it up close).
If you have a week, you can:
Go full adventurer mode and hike rim to river (or even rim to rim, if you’re really ambitious).
Camp overnight below the rim (or snag a spot at Phantom Ranch).
Combine it with other Southwest road trip stops (Utah’s Mighty 5, Sedona, or Monument Valley).
2️⃣ What’s the best hidden viewpoint most tourists miss?
Cape Final on the North Rim.
While Mather Point and Hopi Point are stunning, they’re also where everyone goes. If you want a quiet, mind-blowing view without the crowds, hike to Cape Final.
It’s only 4 miles round trip.
The views are some of the best on the North Rim.
No shuttle buses, no railings—just pure, unfiltered canyon beauty.
If you’re on the South Rim and want a similar secret spot, try Shoshone Point (a flat 2-mile round trip with an incredible overlook).
3️⃣ Can I drive my own car everywhere, or do I need the shuttle?
Depends on when and where you go.
🚗 Driving Your Own Car:
Allowed on Desert View Drive (South Rim) and all North Rim roads.
Best for early mornings or off-season visits (less traffic).
Ideal if you’re short on time and want to hit specific viewpoints fast.
🚌 Using the Shuttle Bus:
Highly recommended for the South Rim (especially during peak season).
The ONLY way to access Hermit Road (March–November).
No parking stress—just hop on and off at different stops.
Our take? We did a mix. Shuttle for busy spots, car for the scenic drives. Best of both worlds.
4️⃣ What’s the best sunrise spot in the Grand Canyon?
Desert View Watchtower (South Rim).
Most people flock to Mather Point, but Desert View Watchtower gives you:
A wider view of the canyon (plus a peek at the Colorado River).
Fewer crowds—because most people don’t want to drive that far early in the morning.
A historic watchtower that makes for killer sunrise photos.
On the North Rim? Point Imperial is your best bet.
5️⃣ Can I bring my dog?
Sort of. But it’s complicated.
Dogs are allowed on the Rim Trail and in developed areas on a leash.
They are NOT allowed below the rim (aka no hiking down Bright Angel or South Kaibab with your pup).
The South Rim has a kennel if you need to board your dog while you hike.
🚨 Our advice: If you’re planning to do a lot of hiking, leave the dog at home.
6️⃣ Is there Wi-Fi or cell service?
LOL. No.
Okay, okay—some spots have service (especially near Grand Canyon Village), but once you go below the rim? You’re off the grid.
Where you MIGHT get service:
South Rim Visitor Center
North Rim Lodge area (better, but still spotty).
🚨 If you NEED Wi-Fi: Your best bet is the lodges and cafés.
📵 Pro Tip: Download maps, trail guides, and emergency contacts BEFORE you arrive.
7️⃣ How bad is the altitude? Will I feel it?
It depends—but yes, you might.
The South Rim is at 7,000 feet. The North Rim? 8,000+ feet. If you’re coming from sea level, you might feel:
Short of breath faster than usual.
Mild headaches or fatigue.
Dehydration (it sneaks up faster at altitude).
💡 Tips to avoid feeling awful: Drink extra water. Altitude + desert air = dehydration city. Take it slow on the first day. Give your body time to adjust. Skip alcohol the first night. (We know. But trust us—altitude and booze don’t mix well.)
8️⃣ What’s the best time of year to visit?
It depends on what you want:
🌸 Spring (March–May): Best mix of good weather and fewer crowds.
☀️ Summer (June–August): Hot, crowded, and shuttle buses are packed. Best for North Rim or early morning hikes.
🍂 Fall (September–November): Cool temps, fewer people, and stunning views. The ideal time to visit.
❄️ Winter (December–February): Snowy, magical, and totally different. South Rim is open, North Rim is closed.
9️⃣ Is there anything to do besides hiking?
Absolutely!
Scenic Drives: Desert View Drive and Hermit Road (both amazing).
Helicopter Tours: Insanely cool but pricey.
Colorado River Rafting: Day trips or multi-day trips.
Mule Rides: South Rim has them, but they book up fast.
Stargazing: One of the best dark sky parks in the U.S.
🔟 Final Question: Is it really worth the hype?
1000% YES.
No photo, no video, no travel guide does the Grand Canyon justice. You just have to stand on the edge, stare into the vastness, and feel how tiny you are in the best way possible.
